Monday, December 30, 2013

Tamale Pie

For the last pie of the year I decided to do something very different, a Tamale pie (think taco filling with corn muffin on top). I stumbled on a recipe over here and thought it looked yummy. Corn muffin mixes are rare in Australia, so I had to follow another recipe to make those. It was tough enough just finding the cornmeal (hint: look for polenta and read the ingredients carefully to make sure it's actually corn meal)!

Ingredients
Filling

  • 500g minced beef
  • 1 brown onion
  • 1 small can corn kernels
  • 1 can kidney beans
  • 1 can crushed tomato
  • 1 grated carrot
  • 3 small brown onions*
  • 1 packet of Taco seasoning
Muffin Topping

  • 1 cup cornmeal
  • 1 cup plain flour
  • ⅓ cup white sugar
  • 2 teaspoons baking powder
  • ½ teaspoon salt
  • 1 egg, beaten
  • ¼ cup oil (original recipe says canola but I used olive)
  • 1 cup milk

Method
  • Preheat the oven to 200ºC.
  • Make the filling by frying the onion until soft, adding the mince and frying until brown, adding the seasoning and stirring until mixed and then adding everything else. Leave it simmer while you get on with making the muffin mix.
  • Make the muffin mix by stirring together all the dry ingredients in a bowl and the mixing in the wet stuff gently until you've got a lovely yellow consistent gloop.
  • Add some leftover cornmeal to the filling if it's a bit wet until it's nice and thick.
  • If you've not used an oven-safe frying pan you should now transfer the filling to a pie dish. Top the filling with globs of the muffin mix in a pleasing pattern. It will spread a little.
  • Bake for 20 minutes or until the muffin topping is cooked.
I thought this was quite nice but the muffin top was too sweet. It was so sweet my daughter was turned off it. I reckon my American readers would probably find it palatable (based on my experience with corn muffins over there) but I think next time I'll halve the sugar.

* at this point I was just throwing stuff in I had in the fridge to make it a semi-balanced meal :)

Sunday, December 29, 2013

Chicken Pie

Tonight's pie - the second last of the pies in this Year Of Pie - was a yummy chicken pie. With bacon, mushroom and Pinot Grigio. I made it up as I was going along, and the wine I was drinking as I was cooking it was tasty, so I chucked some in. Yum.

The base was shortcrust and the top a rough puff. Along with the other ingredients already mentioned, I threw in an onion, a chicken stock cube and a light sprinkling of salt, pepper and rosemary. It all came together rather nicely.

Ingredients

  • 650g chicken thighs, cubed
  • 4 short rashers bacon, chopped up
  • 1 brown onion
  • 6 small brown mushrooms
  • 1 generous splash (a sploosh?) white wine (whatever is on hand that you quite like, or just use water if you don't want to use wine)
  • 1 chicken stock cube
  • a dash of rosemary
  • salt, pepper to taste
  • some plain flour to make the gravy
  • 250g butter and 550g flour to make the pastries
Method
  1. Prepare the pastries beforehand so they can chill. Remember that the rough puff needs to be folded and chilled several times so plan ahead a few hours. This is a good pastry to make during the day on a weekend spent at home since each fold and chill takes only a few minutes.
  2. Blind bake the case. This takes about 30-40 minutes so while it's going you can prepare the filling.
  3. Fry up all the filling bits however you'd normally do it. You might also like to add some cream (about 1/3 cup I suppose) but I'm happy with how it came out without that. Just before you use the filling you should thicken it up with some flour. Just sprinkle some on, stir and repeat until the gravy is thick enough.
  4. Fill the pie and top with the rough puff and bake for 40 minutes. Add an egg wash if you can be bothered. As you can see from the photos I didn't.
What I like about this pie is that I'm quite comfortable making it (or something like it - whatever filling) as just a thing we can have on a weekend. Thanks to this Year of Pie I find it quite easy to make the pastry and do all the construction. What a wonderful thing!

Wednesday, December 25, 2013

Bakewell Tartlets

Given this is a Great British Bake-Off inspired Year Of Pie I figured it would be wrong to go the entire year without baking a Bakewell Tart. I've even used one of the contestant's recipes as a reference. I didn't follow it exactly for various reasons.

Ingredients
For the pastry
  • 100g butter, chilled and cubed
  • 200g plain flour, sifted
  • 40g icing sugar, sifted
  • 3 tbsp chilled water
For the frangipane
  • 110g butter, softened
  • 110g caster sugar
  • 2 eggs, beaten
  • 80g ground almonds
  • 2 tbsp plain flour
Also
I was just chuffed to bits with how these
came out. Look at that pastry! Just look at it!
  • Some raspberry jam (at least a few tablespoons worth)
Method
  1. Put the flour and sugar into a blender. Blend in the chilled butter until it resembles coarse breadcrumbs. Add the water 1tbsp at a time while still blending. Continue to blend until the dough starts to ball up. Turn out onto some plastic wrap, squish into a thick disk, cover fully and refrigerate for an hour before use.
  2. Place little tart-removal paper strips in the cups of a 12-cup cupcake tin (see previously). Unwrap the pastry, place a large sheet of greaseproof paper on top and roll out the pastry to a thickness of 1mm. Cut out 9-10cm rounds from the pastry (a good centimeter larger than the cupcake cup) and gently push into the cupcake tin. Chill for 15 minutes.
  3. Preheat the oven to 170°C.
  4. For the frangipane, place the ingredients in a bowl and beat with an electric mixer until smooth and thoroughly combined.
  5. An action shot! You don't get many of those
    on this blog, but they were just so PUFFY!
  6. Prick the bases of the pastry cases then place (a generous) half a teaspoon of the jam in each. Zap the jam in the microwave for 10 seconds to soften it up a little if it's too hard to work with. Top with the frangipane mixture. I used a piping bag to get the frangipane in nice and evenly. Bake in the oven for about 30-40 minutes until the frangipane is risen and golden. Cool in the tin for a few minutes then transfer to a wire rack.
      The original recipe included making the jam, which I just wasn't up to doing on Christmas Eve.

      It also included half the frangipane I've included above. I ended up tripling the amount, but that was a little too much - as you can see above they're really slightly too ... generously tall. Doubled would be fine, so that's what I've included in the ingredients list.

      The original recipe had the baking time at 25 minutes which was way too short - my tartlets needed 40 minutes. You could use any jam you like in the base.

      So yummy!

      Sunday, December 22, 2013

      Custard Tarts Revisited

      The first batch. At least I remembered to sprinkle the nutmeg
      on this lot.
      My daughter requested custard tarts to celebrate the end of the school year. Oh, OK, twist my arm :) I varied the recipe from last time by making a chocolate crust instead of the plain (though sweet) one. I actually made two batches, refining the recipe the second time. The first effort used muffin tins (making 12 tarts) which meant lower sides on the tarts (my largest pastry cutter is 9.5cm) resulting in less custard. I also had less cocoa in the pastry which was also rolled out much thicker (about 2-3mm) so while they were OK, I figured I could do better.

      The next effort made 16 tarts in a couple of cupcake tins, though I could probably have gotten 18 out of the dough if it hadn't been so warm in the kitchen (the dough got way too squishy to work with).

      Always position the slightly munty ones out the back there.
      Ingredients

      • 200g flour
      • 40g cocoa
      • 50g icing sugar
      • 160g chilled, cubed butter
      • pinch of salt
      • 4 tbsp chilled water
      • 3 eggs, beaten
      • 1 1/4 cups slightly warmed milk
      • 1/4 cup caster sugar
      • 3 tsp vanilla
      • nutmeg to sprinkle
      Method
      Just after baking - note the bits of paper in the
      older, less non-stick tin.
      1. Put the flour, cocoa, sugar and salt into a blender. Blend in the chilled butter until it resembles coarse breadcrumbs. Add the water 1tbsp at a time while still blending. Continue to blend until the dough starts to ball up. Turn out onto some plastic wrap, squish into a thick disk, cover fully and refrigerate for an hour before use.
      2. Roll the pastry out until quite thin - about 1mm or so. Use some flour (sparingly) to stop it sticking. Cut circles that are about 1cm larger than the cupcake cup top. Cut out lengths of 1cm wide baking paper that fit in the tray holes with bits poking up - these will be handles to help pull the tarts out if they stick (which can happen with sloshed custard). Carefully poke the circles into the holes, being sure to not create a fold. Press into the corners. If you need to press the pastry around a bunch then it's a good idea to use a cast off piece of dough rolled into a ball to push the pastry around with. This will prevent you warming up the case pastry too much when fiddling with it, or poking holes with your finger tips. Cover with plastic wrap and chill for about 20 minutes.
      3. Preheat the oven to 200°C. Jab the case bases with a fork a couple of times, cover with a little bit of foil (carefully - I find it's easy to accidentally push the pastry sides down) and some baking weights. Bake for 10 minutes and then remove the foil to bake a further 10 minutes (after starting the second bake, prepare step 4). If your oven is as uneven as mine that's a good opportunity to turn the tray around to even out the bake a little. It can be tricky to tell if the pastry is done because it's so dark, but that cooking time should be about right.
      4. Reduce oven to 180°C. Mix the slightly warmed milk, caster sugar, vanilla and eggs. Skim off any bubbles and floating egg white chunks. Once the pastry comes out of the blind baking, carefully pour the custard into the cases up to the rim. Sprinkle with the nutmeg.
      5. Bake for 20 minutes or until the custard doesn't wobble too alarmingly. Cool the tarts in the tin for about 5 minutes and then cool on a wire rack.
      Next time I'll tweak the recipe by adding just a little more sugar to the crust. Maybe another 20-30 grams. I seem to recall reading somewhere that a 1:2 ratio of cocoa to sugar is good to aim for, but I might be making that up.

      Sunday, December 15, 2013

      Ginger, Pistachio and Chocolate Tarts

      Heading off to a friend's house for lunch on Saturday I promised to bring along something sweet for dessert. I decided to adapt this recipe to individual tarts. You'll need a couple of 6-cup muffin tins to make this.

      Ingredients

      • ¾ cup shelled pistachio nuts, chopped very finely
      • 225g flour
      • 125g butter, chopped into 1cm cubes and chilled
      • ¼ cup caster sugar
      • 4 tbsp chilled water
      • ½ cup heavy/double cream
      • 200g semi-sweet dark chocolate
      • ¼ cup crystallised ginger chopped into tiny bits
      Method
      1. Put the flour, sugar and pistachio nuts into a blender. Blend in the chilled butter until it resembles coarse breadcrumbs. Add the water 1tbsp at a time while still blending. Continue to blend until the dough starts to ball up. Turn out onto some plastic wrap, squish into a thick disk, cover fully and refrigerate for an hour before use.
      2. Roll the pastry out until quite thin - about 2-3mm or so. I did this in two lots to keep the rolling out easier. Use some flour (sparingly) to stop it sticking. Cut circles that are about 1cm larger than the muffin cup top. Carefully poke the circles into the holes, being sure to not create a fold. Press into the corners. Cover with plastic wrap and chill for about 20minutes. Preheat oven to 200°C.
      3. Jab the case bases with a fork a couple of times, cover with a little bit of foil and some baking weights. Bake for 10 minutes and then remove the foil to bake a further 10 minutes. If your oven is as uneven as mine that's a good opportunity to turn the tray around to even out the bake a little. The pastry is done when you can see that there's no darker, slightly translucent bits of pastry dough left - that is, it's all cooked. Let the cases rest for a few minutes before removing to a wire rack.
      4. Place your ginger in the bottom of the cases. You want to see a pretty solid cover across the bottom, but not too thick.
      5. Now we're on to making the ganache. The key to making a ganache is to not overheat the chocolate. If you do it'll separate and you'll see it turns grainy. Chuck it at that point and start again.
      6. Heat the chocolate in bowl in a microwave on high for about a minute, stopping to move the chocolate around a bit halfway through. Add the cream and heat a little more. Stir the cream and chocolate together - at this point you should have a nice consistent chocolate liquid with a few chunks of chocolate. Eventually the chocolate will all melt, though do remember to keep stirring. If it's not quite all going in then you can zap it a little longer in the microwave. Go for 5 second intervals at most. I've had ganache turn bad almost a minute after taking it out of the microwave.
      7. Pour the ganache into the cases. Chill.
      Yummy!

      I found the pistachio flavour was pretty much lost to the chocolate. I'm going to try putting more nuts in next time and see if that helps. Even the leftover pastry bits that I baked separately don't really taste very nutty. The original recipe had some of the pistachio sprinkled over the top with the ginger, but I like the smooth, shiny, chocolate finish of the little tarts.

      Sunday, December 8, 2013

      Experimenting with Potato Crust

      Sorry, no photo.

      Inspired by my friend Judy's endeavours, I attempted a potato crust for the pumpkin and blue cheese pie. I poked around the Internet and settled on the following as my recipe.

      Ingredients
      • 500g butternut pumpkin
      • 1 brown onion, sliced
      • 1 tsp dried thyme
      • 100g blue cheese
      • 25g chopped walnut (use up to 100g more if you like walnuts a lot, or sub in pecans if you like)
      • 3 large potatoes (I used desiree) grated
      • 2 eggs
      • 1 tbsp olive oil
      • generous pinch of salt
      Method
      1. Pre-heat the oven to 200º C.
      2. Mix the potato, eggs, olive oil and salt. Line a pie tin (mine is a standard 20cm one) with the potato.
      3. Cover the pie crust with foil and bake for 20 minutes. Remove the foil and bake a further 10 minutes.
      4. While the crust is baking, peel, de-seed and slice the pumpkin flesh thinly. Coat with a bit of olive oil, some salt and the thyme and spread out onto a baking tray. Coat the onion with some oil and salt, and spread it into a single layer on the second tray. Roast the vegetables for 20 minutes.
      5. Pour the balsamic vinegar over the onion to coat, and turn the oven down to 200º C and bake for another 10 minutes.
      6. At some time during all this the pie crust will come out of the oven. Set it aside; it's OK to cool a little.
      7. Mix the pie filling ingredients and fill the pie. Bake for about 5-10 minutes until the cheese is a melted.
      So, it didn't quite work as planned. The bottom of the pie stuck to the tin and was not strong enough to hold together. I'll bake it for longer next time, perhaps just lining the top of the edge of the pie with foil to stop it burning while the rest of the pie crust cooks. Also, I will grease the tin before putting in the potato. I'll probably also drop one of the eggs from the mix.

      And yes, next time I'll try to remember to take a photo!

      Chicken, Sweet Potato and Blue Cheese with Polenta Crust

      I wanted to experiment a little this weekend and try out some non-flour crusts. I saw a recipe that has a polenta crust on top and though that sounded pretty neat. I didn't like the sound of that filling though for this weekend and I wanted to also use a pastry crust because it'd been a while since I'd made shortcrust pastry. I decided to use that crust on top of another pie that looked delicious.

      It was a partial success :)

      Ingredients
      • 500g chicken thigh
      • 3 small sweet potatoes, cut into chunks
      • 1 red onion, finely sliced
      • 2 garlic cloves, crushed
      • 3 tbsp olive oil
      • 2 tbsp plain flour, plus extra for dusting
      • A few sprigs of fresh rosemary, leaves stripped
      • 500ml chicken stock, hot
      • 150g blue cheese, crumbled
      • 4 tbsp double cream
        Polenta Top Crust
      • 500ml (2 cups) milk
      • 150g (1 cup) instant polenta
      • 1 cup grated parmesan cheese
      • 1 egg, beaten
        Shortcrust Case
      • 125g butter, chopped into small cubes and chilled
      • 250g plain flour
      • 4-6tbsp chilled water
      Method
      1. Make the shortcrust pastry using the method described previously.
      2. Blind bake the pastry case while cooking the rest of the components. It'll probably have time to cool a little if you cook things as fast as I do (which is a little slow) and that's OK. Keep the oven at 200ºC for later.
      3. Heat the oil in a pan and fry the onion until soft. Add garlic and chicken and fry until chicken is browned. Add stock, rosemary, sweet potato and simmer until the potato is soft. Add flour to thicken the gravy. Remove from heat and stir in the blue cheese and cream.
      4. Boil the milk with 2 cups of water. Pour the polenta into the boiling liquid in a stream while stirring. Reduce heat to medium/low and continuously stir until the polenta is thick enough that the spoon stands in it. Take off heat and stir in the cheese and egg.
      5. Fill the case with filling, top with the polenta and bake until the polenta is browning on top.
      So, what went right? The flavour of the filling was quite nice. 

      What went wrong?
      1. I only ended up using 2 sweet potato in the filling but even then I only needed 2/3 of the filling I cooked.
      2. 500ml of stock is way too much. It made too much gravy that thinned out the flavour of the filling too much. I even removed 1/3 of a cup of it during cooking and there was still way too much. And I left out the cream because it would have thinned it out even more. 100ml would be plenty, but probably even 50ml would be enough - just keep an eye on the liquid and make sure there's some there to soften the sweet potato.
      3. 1 cup of polenta is also way too much. 1/2 cup would have been plenty. It ended up being quite a thick layer on top and there was just too much in each serving. I think I might have stopped cooking the polenta a little early too - next time I use it I'll cook it for just a little longer to see if ends up being a little less runny (it didn't run as such, but it was smooth on the top unlike in the photo from the original recipe).
      Tip: The excess pastry trimmed off the pie crust is really nice with some blue cheese on top :)

      Tuesday, November 26, 2013

      Guest Post: Pumpkin Pie Variation

      My friend Judy tried out this flourless variation on the Pumpkin and Blue Cheese Freeform Pie.

      So, I thought I’d let you know about our attempt. We made something a little different. The pie itself was cubes of pumpkin, roasted, and bits of red onion, roasted.


       Then with about 100g blue cheese crumbled


      and mixed through (with hands).

      The pie crust was the really different part. It was hash browns. So, shredded potatoes, rinsed and patted dry on towels, salted…


      cooked on the stovetop in a skillet with lid on until the underside was browned and the top a bit cooked, then pushed onto the bottom and up the side of the skillet with the back of a spoon


      then cooked in the oven until brown and crisp.


      Then add the filling and bake!


      The verdict: yummy! But... the crust didn’t work. Hash brown crust completely collapsed (the sidey-bits) when scooped out of the skillet. Sigh. Need quite possibly to pre-cook it longer, both on the stovetop and in the oven. But it was so yummy we’ll be giving it another shot.

      Thanks so much for the idea!!

      Tuesday, November 19, 2013

      Repeat: Spanish Chicken Pie

      I made the Spanish Chicken Freeform pie again tonight for my daughter's Birthday dinner. It was a little different this time.

      I followed the pastry instructions as closely as I could: I did not add water like last time, though the pastry did not ball up in the blender like the recipe says it should. It remained very crumbly and difficult to work with. I rolled it out between two sheets of baking paper, but it was still very crumbly. It broke most of the time when I attempted to fold it up. You can see the cracks and leakage that's burnt in the photo.

      I got the stock volume correct this time so the filling was perfect. There was too much filling - I'd say 500g of chicken would be plenty.

      Even though the pastry was such a pain to work with the resulting pie was absolutely delicious. When next I'm up for a bunch of frustration I'll make it again! I think I'll add a tablespoon or two of water next time.

      Saturday, November 9, 2013

      Pear and Apple Tarte Tatin

      I didn't have the energy for anything Earth-shattering tonight so I just threw together a pear and apple tarte tatin (roughly half and half: two and a bit apples, two pears). Used the same old recipe from way back. Sprinkled a little cinnamon onto the lot before baking. Very, very tasty. As usual the fruit shrunk more than I expected - I really need to pack it all in more tightly. Did I mention it was very, very tasty?

      Monday, November 4, 2013

      Pumpkin and Blue Cheese Freeform Pie


      I wanted to make another savoury pie this weekend and decided to try to make a vegetable pie. That's a bit of a challenge for me because I'm not known for my love of chunky vegetable things (ratatouille, for example, is not something I'm very fond of). This pie jumped out at me as I was randomly wandering the Internet looking for inspiration. It's an adaptation of this recipe.

      It was absolutely delicious.


      Ingredients

      • 500g butternut pumpkin
      • 1 brown onion, sliced
      • 1 tsp dried thyme
      • 100g blue cheese
      • 25g chopped walnut (use up to 100g more if you like walnuts a lot, or sub in pecans if you like)
      • 1 amount (250g flour) rough puff pastry

      Method
      1. Make the pastry. The rest of the preparation should give it just enough time to chill.
      2. Pre-heat the oven to 225º C and line two baking sheets with foil or baking paper.
      3. Peel, de-seed and slice the pumpkin flesh thinly. Coat with a bit of olive oil, some salt and the thyme and spread out onto a baking tray. Coat the onion with some oil and salt, and spread it into a single layer on the second tray. Roast the vegetables for 20 minutes.
      4. Pour the balsamic vinegar over the onion to coat, and turn the oven down to 200º C and bake for another 10 minutes.
      5. Roll out the pastry to make a large circle slightly larger than the tray you'll be using to bake the pie. Crumble the cheese onto the pastry leaving a 4cm border. Sprinkle the nut pieces over the cheese and the spread the pumpkin and onion mix over the top of that. Fold the 4cm overlap into the centre and bake for 40-50 minutes. Slightly longer because of the folds, but don't overcook the filling.
      I modified the recipe I found at the link by using my simpler pastry. I also altered the vegetable cooking time as the instructions were unclear and my pumpkin ended up a little overcooked. Because of this I ended up not cooking the pie for quite long enough and some of the pastry was undercooked. I also used 100g less of the nuts than the linked recipe as I'm not a big fan of walnuts and I couldn't find pecans.

      Sunday, October 27, 2013

      Repeat pie: freeform chicken and spinach

      I made the freeform chicken and spinach pie on request this weekend. I left out the chorizo as planned, and then accidentally left out the lemon zest as well. As I suspected the chorizo didn't add much but the lemon was missed. They were still quite yummy, but the lemon adds an little something extra.

      Sunday, October 20, 2013

      Pear Pie

      This weekend I wanted to make a fruit pie for dessert on Saturday night. It's currently not really any particular fruit season, except maybe quince and I knew I didn't have the time to cook quince. So I went with some pears which looked yummy.

      I followed the recipe at about.com Southern Food to the letter even though I was pretty certain it'd have problems. And it did.

      Ingredients

      • pastry for 2-crust pie (I used a double amount of my standard rough puff)
      • 5 peeled, sliced fresh pears
      • 1 cup sugar
      • 1/4 cup flour
      • 1/2 teaspoon grated lemon peel
      • 1/2 teaspoon cinnamon
      • 1/8 teaspoon salt
      • 2 tablespoons fresh lemon juice
      • 2 tablespoons butter, cut in small pieces
      Method

      1. Line a 9-inch pie plate with pastry. Add the sliced pears. Combine sugar, flour, lemon peel, and seasonings; sprinkle over the pears. Drizzle with the lemon juice then dot with the butter. Make a lattice top; flute edges. Cover edge of pie with a strip of foil. Bake at 220°C  for 25 minutes. Remove foil and bake about 10 minutes longer.
      2. To make a lattice top crust, cut rolled out dough into 1/2-inch-wide strips. Arrange 5 to 6 dough strips across top of filling. Form the lattice by arranging more dough strips at right angle to first set of dough strips, weaving the strips if you wish. Trim dough strips even with the overhang on bottom crust. Tuck ends of dough strips and overhang under; press to seal then crimp the edges.
      What Went Wrong
      The pie was way too wet. When I pulled it from the oven - even after giving it an extra 10 minutes - liquid was slopping over the side of the pie when I tilted it slightly. I poured out about 1/2 cup of liquid before even attempting to cut it, and there was still a bunch of liquid in the bottom.

      The pastry on the bottom wasn't fully cooked either. It wasn't that it was soggy, it wasn't completely baked.

      The flavour was great but concentrated on the top - sprinkling the flour/sugar/spice mixture on the top just meant it sat there. I shook the pie a little before cooking but that didn't seem to distribute the mix much.

      I think I'll try this recipe again but modify it by pre-cooking the pear to reduce the liquid and combine the flavour some more, and I'll also blind bake the case.

      I've looked around the Interwebs to try to get some advice on what other things you can do in the face of a too-wet pie, but haven't really found anything (except cook it longer, which I intend to do...) I do wonder whether the ripeness of the pears (they were quite crisp) or the variety of pear (I'm not sure) might have something to do with it. Nothing I've read seems to indicate that's the case though.

      Monday, October 7, 2013

      Individual Shepherd's Pies

      This week was a partial success. I picked up some cheap ceramic individual pie dishes so thought I'd see whether I could use them to make some little pies. It turns out I can't - not in the style I tried anyway. The pies had a rough puff case, yummy porterhouse steak (also bought cheap on special) and vegetable filling and potato mash top.

      The dishes stopped the pastry from cooking properly. Perhaps with a little longer in the oven they might have cooked through properly, but I actually doubt it. I'll keep the dishes for doing other things (I'm not sure yet) and see about getting some metal tins to make individual pies in.

      Friday, September 27, 2013

      Chicken, Fetta, Mushroom and Spinach free form pies

      During the first week of the school holidays my daughter requested two pies. The first was a repeat performance of the apple crumble pie (she'd missed out the first time around) earlier in the week. For Friday dinner she also requested a savoury pie. I knew I wouldn't have too much time and energy to make this second pie so I went with something simpler. This recipe is from Tanya Walford via the ABC website. "This pie recipe is a favourite and a staple in our home. It is as much about the spinach and cheese as it is the chicken." I varied the recipe slightly as I didn't want the chicken to cool (I knew I'd be freezing a couple of the pies for later reheating).

      The recipe makes four pies.

      Ingredients

      • 1 chicken breast fillet, cubed into 2cm pieces
      • 6 button mushrooms, sliced
      • 1 chopped brown onion 
      • 1 crushed clove garlic
      • 1 small zucchini, grated 
      • 100g fetta
      • 75g fresh ricotta
      • 100g baby spinach chopped up
      • Grated zest of one lemon
      • 1 tsp of dried oregano flakes
      • 2 tbsp grated parmesan
      • Salt and pepper
      • 1 egg - beaten
      • 1 lot of rough puff pastry (250g flour, 125g butter)

      The original recipe had frozen 125g spinach and instructions about removing the moisture and... I just went with a packet of fresh baby spinach and chopped it up. Worked fine.

      Also, I added a chorizo to the mix, but this turned out to be completely unnecessary and I'll skip it next time.

      Method

      1. Prepare the pastry an hour or more beforehand and chill in the fridge.
      2. Preheat oven to 200ºC, or 180 fan forced.
      3. Heat some olive oil and saute onion and garlic until softened but not coloured. 
      4. Add chicken cubes and mushroom and season. Sprinkle a little (1 tbsp) flour over the lot when it's about cooked and stir that through to soak up the juices. When the chicken is cooked through, set aside.
      5. In a separate bowl, crumble in fetta and ricotta, parmesan, lemon zest, oregano, spinach and zucchini. Using hands mix thoroughly and season with salt and pepper.
      6. Mix the chicken etc and add into the cheese mixture. Stir well until combined.
      7. Cut your pastry into 4 pieces.  Roll each out into a square (roughly 15cm sides). Place a couple on your baking tray, rotated so they're diamonds (oriented so they won't fight with the other pies when folded). Plonk some filling in the centre, brush the edges with the egg and fold opposite corners into the middle, pinching the seams together well but keeping a hole in the middle for hot steam to escape. Repeat with the other two pieces. Finish all the filling - or freeze a batch for another day.
      8. Brush each pie with egg and bake in the oven for approximately 30-40 mins or until the pies are puffed and browned.

      Saturday, August 24, 2013

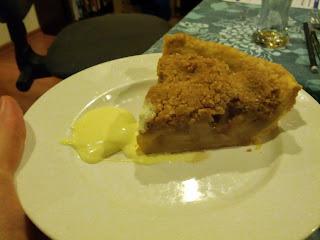
      Apple Crumble Pie


      This recipe is kinda cobbled together from a bunch of different places because no single recipe seemed to be what I wished to make.

      On the bottom is a standard shortcrust base. No sugar - there's going to be plenty of sweetness on top.

      Chop up 6 peeled and cored granny smith apples into thin(ish) slices (used my spiral peeler/corer). Don't worry if it looks like too much apple - it'll shrink as we cook out some of the water.

      On the theory that you should never put fruit into a pie uncooked lest you end up with a soggy mess, I cooked the apple in a frying pan for about 20 minutes on a medium temperature in 50g of butter and 1/2 cup of castor sugar to reduce the amount of liquid and soften the apple. Added some cinnamon and a pinch of nutmeg. Yum!

      On the top is 1/2 cup flour, 1/2 cup brown sugar and about 45g butter which has been chopped into the flour and sugar to make little breadcrumbs. I used my mini blender (wand attachment) to do this chopping.

      Roll out the dough to fill a pie dish.

      The cooked apple, the crumble mixture and the pie base can all be prepared, covered and refrigerated before assembly when it's time to bake the pie.

      Blind bake the base for 15 minutes at 190ºC. Then put in the filling, cover with the crumble mixture and bake for another 40 minutes.

      Serve with a little cream.

      Tuesday, August 20, 2013

      Spanish Chicken Pie

      Yet another pie I didn't photograph
      before serving
      I made this pie for lunch because I was having friends Sam and Jesse over who I know like Spanish cuisine. They are particularly fond of chorizo sausage. This recipe is from Woolworths Fresh magazine, issue 90, August 2013. Yes, the free one from the store.

      It's an open pie (there's a name for this kind of pie - Sam can maybe remind me of it :-) that's made by

      laying the ingredients onto the pastry and folding the sides up and over (but not completely over) to hold the filling in.

      Ingredients (filling):

      • 2 tbs olive oil
      • 750g chicken thigh fillets, chopped into little bits
      • 2 chorizo, sliced
      • 1 red onion, diced
      • 1 large red capsicum, diced
      • 1 tbs plain flour
      • 3/4 cup chicken stock
      • 2 tbs fresh oregano (I used 1 tbs dried)
      • 16 pitted green olives - I sliced them in half
      • 2 tbs grated parmesan
      Ingredients (pastry):
      • 2 cups plain flour
      • 1 tsp paprika
      • 1 tsp salt
      • 160g butter, chopped
      • 1 egg
      Method:
      Sam constructing the pie
      1. First the pastry is made by placing the 2 cups of flour, paprika, salt and chopped butter into a food processor. Process until the butter is small like breadcrumbs. Add the egg and process until the mixture forms a ball. Well, that's the theory. I processed the mixture for some time before giving in and adding a bunch of water to make it ball up. I used a large egg too... Remove the dough, squish together and wrap in plastic. Chill for at least 30 minutes. You can make it the day before and store in the fridge, or up to three months before and freeze (defrost in the fridge).
      2. Preheat oven to 200ºC.
      3. Heat the oil in a pan and cook the chicken, in batches if necessary, until browned. Set aside, ensuring there's oil in the pan. Add the chorizo, onion and capsicum and fry for 5 minutes. Stir in the 1 tbs flour, pour in the stock and add oregano and chicken. Bring to boil and reduce to simmer for 15 minutes or until it's not too runny. Stir in olives and take off heat.
      4. Roll pastry out (using additional flour on the rolling surface and top of the dough to keep it from sticking) until about 35cm in diameter. Transfer to cooking tray. Spoon filling into centre, leaving about 4cm around the edge. Fold in sides, sprinkle with cheese. You can also brush the pastry top with another beaten egg, but I didn't do this (it just makes the pastry brown more). Bake for 25 minutes (well, in my oven 35 minutes). Serve!
      Now, I stuffed up at one point: I put in way more chicken stock that was called for. Over twice as much. I added more flour to turn it into gravy, but there shouldn't be as much as you see in the photos. It was still delicious though :-)

      Monday, July 29, 2013

      A non-pie post: chocolate eclairs

      I bake other things too, and on Sunday I had a go at my second batch of chocolate eclairs. They were pretty yummy, but I need a better recipe for my non-fan-forced oven.
      Choux pastry rolls with creme patisserie filling (vanilla with a hint of cinnamon because reason I can't recall and I'll leave it out next time) and 70% chocolate ganache (with a hint of golden syrup so it wasn't too bitter). Yum.

      Sunday, July 28, 2013

      A Very Porter Pie

      Last weekend was the inaugural PAX Australia! It was three days of gaming awesomeness.

      This weekend I bought a really yummy porter style beer called Ass Kisser Smoked Porter. It was so yummy I decided to invent a pie around it. I added some beef, bacon, onion, mushroom, carrot and broccoli (thus making it a well-rounded meal of course). A beef stock cube and some tomato paste rounded out the flavour. As when I've previously made a beef pie I let it simmer for about an hour and a half. I made up some rough puff pastry for the case and top and ended up with a pie that was absolutely delicious.


      It's a little lighter on the top than usual because I didn't bother with an egg wash on top.

      Using the rough puff for the base had me a little worried as it puffed up much more than when I've previously made rough puff. It ended up not being an issue but I think in the future I'll play it safe and go with the shortcrust instead.

      Sunday, July 14, 2013

      A weekend quiche

      Last weekend was the annual Python conference for Australia, PyCon AU. I spoke and had a blast.

      This weekend I made a quiche which was a slight variation on the Lorraine recipe. I added mushroom and it was tasty :-)

      Sunday, June 30, 2013

      Still making pies; here's some tutorial videos

      I've been moving house so not much pie baking but I did manage to make a beef pie last weekend. Instead of cheating and using frozen puff pastry for the top I made a rough puff pastry (while still using a shortcrust pastry for the base). Unfortunately the new oven I'm using is temperamental and slightly random in its temperature control so the pastry wasn't fully baked through. The pie was still delicious though.

      This weekend I'm going to be making up a  chicken pie (some chicken, peas, corn, carrot, chicken stock, cream, cook and put in a pie case). And I've bought a thermometer to try to nail down the oven's strange temperature behaviour...

      There's some great tutorials out there for making pastry that I've watched so far this year, but the best of the rough puff videos that I've seen is this one by Michel Roux:


      And here's a good one for making Short Crust Pastry in the blender from Sarah Cook at BBC Good Food:

      Sunday, May 19, 2013

      Quick 'n Dirty Rough Puff

      Not a picture of the pastry
      Another break, and this week I found myself without a food processor so I had to make the pastry for this weekend's Tarte Tatin by hand (yes, I also found myself without a new recipe). I chose to make a rough puff pastry rather than try to make shortcrust by hand again. Maybe next time...

      I poked around the Internet and found a number of recipes with a variety of methods. The following is basically inspired by a few of them:

      Ingredients

      • 250g plain flour
      • 250g butter, chopped into little chunks (no bigger than ½ cm)
      • 100ml cold water
      Method
      1. Put the flour into a large bowl. Tip in the butter chunks and spend a little time smooshing the butter in with fingertips. Not so much that it melts, just so the chunks aren't big sharp squares any more. I did this process until I started making some little breadcrumb-sized bits of floury butter. 
      2. Make a well and mix pour in the water. Mix with fingertips spread apart - the idea is not to heat the mixture up too much. Mix until there's no obvious water left or large blob of watery flour.
      3. The mixture will most likely still be quite crumbly. I poured the mixture onto a bench and very lightly kneaded into a single blob. It only took a few pushes to do so. Kneading too much will result in gluten forming and the pastry will be tougher (harder) and less short (crumbly and flaky). Once in a blob, smoosh it away from you so it's a flat disk. Wrap in plastic and refrigerate for 20 minutes.
      4. Take the disk and place onto a lightly floured bench. Lightly flour the top too. Basically you can lightly flour it enough so it doesn't stick to the bench or rolling pin or have chunks of butter popping out. Now roll it out away from you so it's makes a tall rectangle about 3x higher than across.
      5. Fold the bottom third up and the top third down so there's now three layers. Rotate ¼ turn and roll out again to another 3x1 rectangle. Fold over again.
      You may now use the pastry immediately or refrigerate for another 20 minutes. I believe that cooling it again will mean the pastry works better. It worked pretty well for me without the cooling.

      Thursday, May 2, 2013

      Quiche Lorraine and a Pie

      Yes, oops, forgot to take the photo earlier again!
      After another enforced break from baking, I've come back in force with two pies! Oh yes. I had some friends around last Sunday so decided to bake a meat pie (as previously made) and my first quiche. I started with the Quiche Lorraine recipe from Stephanie Alexander's Cook's Companion and modified it to add some leek.

      Quiche Ingredients

      • One quantity shortcrust pastry as per the meat pie recipe
      • 4 egg yolks
      • 2 eggs
      • 4 rashers bacon, rind removed, chopped into smallish bits
      • 1 leek chopped finely
      • 300ml cream
      • salt, pepper and nutmeg
      Quiche Method
      1. Blind-bake the pastry case per the meat pie recipe. Then turn oven to 170ºC.
      2. Fry up the bacon and leek until the leek is soft and bacon browned. Allow to cool a little.
      3. Mix up the eggs and cream. Season with some nutmeg, salt and pepper.
      4. Scatter the bacon and leek over the case bottom and pour the mixture in. Cook for 20-35 minutes, until firm. 25 minutes worked for me.
      5. Allow to cool before serving.
      And that's it. And it was so delicious!

      Tuesday, April 9, 2013

      A Most Vaguely Defined Shepherd's Pie

      Now, some may disagree on exactly what comprises a "Shepherd's Pie." I say that it's a meat pie with a pastry crust and mashed potato topping, simply because that's how they're sold as fast food in Australia. Even if wikipedia disagrees.

      Either way, I made a damn tasty pie on the weekend that had a shortcrust base, tasty minced beef filling and potato top.

      The filling included:

      • an onion, finely chopped and fried until quite soft
      • a few cloves of garlic, sliced and fried with the onion
      • 500g mince (less would have been better but that was the quantity available to me)
      • a can of chopped tomato
      • a splash of Worcestershire Sauce
      • a beef stock cube
      • some salt and pepper to taste
      • some plain flour to thicken up the gravy before using as a filling
      I simmered all that for about an hour. The crust was made as usual and the mash was a few large potatoes with some milk, butter and an egg yolk mashed through until creamy. I made the mistake of making too much mash and it was too thick on the top. The optimum amount of mash would be about half the thickness of the filling. No more than the thickness of the filling, otherwise the flavour of the filling has to fight with too much potato. Also, when spreading the mash on make sure you start at the edge and make a reasonably good seal before moving towards the center. Don't press hard - you want a good low filling on the side or it might bubble through the sides quite unattractively.

      I think this recipe wins the prize for being the most vague, but this pie can really just be made up with whatever you like in it.

      I'm afraid I have to declare pie-atus for another two weeks as I'm being sent to Jersey for work and will be away from the pie kitchen for both weekends.

      Saturday, March 30, 2013

      Very Tasty Beef Pie

      I'm back from PyCon so it's time for more pie! I was going to make rabbit pie in honor of Easter, but I couldn't source any rabbit, so I made this pie up. I went with the shortcrust case and puff top because I like that combination.

      Ingredients
      • 1 brown onion
      • 500g beef, cubed smaller than 1cm
      • 2 rashers rindless bacon cut into small squares
      • 6 button mushrooms cut into small cubes
      • a splash Worcestershire Sauce
      • 1 beef stock cube
      • 2 cloves garlic
      • Plain flour
      Shortcrust Pastry
      • 225g flour
      • 125g butter cut into small cubes and chilled
      • 3-4 tbsp chilled water
      To Construct
      • 1 sheet puff pastry
      • 1 egg, separated, white lightly beaten
      • 20cm pie dish
      Method
      Zero points for presentation but it was sooo tasty.
      1. Make the shortcrust pastry by placing the flour in a blender, adding the cubed butter and pulsing for 30 seconds; the result should be something like breadcrumbs. If there's large chunks of butter then keep going for a bit. Then set the blender on low speed and add the water one tablespoon at a time. After three or four spoons the dough should start clumping. Continue blending until it clumps into a ball. Remove the dough ball and wrap in plastic to refrigerate for a couple of hours.
      2. Fry the onion in a saucepan that has a good sealing lid until soft. Add the garlic and fry for a minute. Add the beef and cook until browned. Add the sauce, stock cube and enough water to just cover everything. Simmer for 1 hour. Add water if necessary.
      3. Pre-heat oven to 180ºC. Roll out the shortcrust pastry until big enough to cover the pie dish. Place in dish, prick base many times with a fork, cover with paper and pastry weights and blind bake for 15 minutes. Defrost the puff pastry. Remove weights and paper and bake a further 15 minutes. Slowly add some flour to the filling while stirring thoroughly to thicken.
      4. Increase oven to 200ºC. Paint the pie case with egg white and add filling. Cover with puff pastry, ensuring you cover all the existing pastry so it doesn't burn. Crimp around edges with a fork and paint the top with the egg yolk. Bake for 20 minutes until golden brown and puffy on top.
      I served this with mash, carrots and peas. It was pretty damned delicious. Next time I might try a shortcrust top instead - I think it'd be quite nice.

      Saturday, March 9, 2013

      Announcing a brief hiatus

      Or should I say pie-atus?

      I'm off to a conference for the next couple of weeks (PyCon actually, no joke.)

      Because I'm a little frazzled before going I made the peach tarte tatin again today. Because it is just so damned yummy.

      I went with the fully machine-enabled pastry making this time. Take the usual ingredients and blend the butter into the flour in a blender until it's a little like breadcrumbs (no large chunks left.) I just hold down the pulse button for about 20-30 seconds. Then take your ice water and add a tablespoon at a time to the blender, giving it a good whizz (I used the slowest speed - didn't want it to be worked too much) to mix it in each time. On the third tablespoon the pastry should start chunking up. Keep whizzing until it's a solid ball. Continue to prepare as normal (chill, roll, bake, consume.) Yay, if it's anything like I just made it'll be the best shortcrust pastry ever.

      Really. It was that good :-)

      Sunday, March 3, 2013

      Peach and Blueberry Pie


      It's still warm and summery here and I wanted to make up for my family missing out on the peach tarte tatin I made a couple of weekends ago, but I didn't want to make yet another tarte tatin so soon. I'll be making plenty more, don't worry about that.

      Then I stumbled on a recipe in a lifestyle magazine that looked pretty darned yummy, so figured I'd give it a go. It doesn't have an attribution; it's just in Real Living March 2013, page 165.

      Shortcrust Pasty Ingredients

      • 375g plain flour
      • 230g butter, chilled
      • Pinch of salt
      • ½ cup water, chilled
      Filling Ingredients
      • 8 peaches
      • 250g blueberries
      • ⅓ cup brown sugar
      • ⅓ cup white sugar
      • 2 tbsp lemon juice
      • ¼ tsp cinnamon
      • ¼ tsp nutmeg
      • 3 tbsp cornflour
      • 2 tbsp milk
      Method
      1. Make pastry using whatever method. Chill for 2 hours.
      2. Score bottom of peaches with little crosses. Boil in water for 3 minutes and then place into iced water to cool them down. Once cool the skins should peel off.
      3. Slice the peeled peaches around the stone and place in large bowl. Add the blueberries, sugars, lemon juice, cinnamon, nutmeg and cornflour and mix to combine.
      4. Roll out half the pastry to form the base and place in pie dish, trimming excess.
      5. Place the fruit filling into the pie. The pastry base should come up slightly higher than the filling.
      6. Roll out the rest of the pastry and cut into 2cm strips. Make a lattice and place over the pie, trimming excess. Fold the edges of the base pastry over the lattice. Brush top with milk and sprinkle with a little white sugar.
      7. Bake pie for 20 minutes at 220ºC and then a further 40 minutes at 180ºC when the pic should be golden and the filling bubbling.
      Now, I should say right here that the pie was pretty nice as I made it, however the peaches weren't cooked, the base wasn't baked and the liquid was still very runny.

      Here's how I think it went wrong:
      1. The peaches weren't ripe enough. This caused two problems: firstly they didn't peel using the method above. I had to use a peeler in the end after much boiling/cooling frustration. Secondly even after baking the peach didn't soften at all.
        I used the peaches in their not-fully-ripe state in this recipe because the peaches I'd used in the tarte tatin were basically in the same state, so I figured it would be OK. I know otherwise now.
      2. There was way too much filling; ⅔ of the fruit filling would have sufficed. I ended up over-filling the pie and that probably contributed to the undercooking of the peach and the liquid not setting. Don't over-fill the pie. Follow the recipe.
      3. There's no blind-baking step. The first 220ºC is supposed to bake the crust, but I would blind bake next time.
      Oh, and I didn't trim the pastry on purpose because I kinda like the rustic look ;-)

      Saturday, February 23, 2013

      Lime Pie

      This week, because it's still so warm (min 20, max 30ºC every day; not hot, just oddly, constantly warm) I went with a pie that would be eaten cool. Ever since I made the Lemon Meringue Pie I wanted to try a lime-based pie.

      It's the first time I've made a crust with biscuits and I think it worked out pretty well. I prefer pastry though :-)

      It's a "Key Lime Pie" recipe, but the limes we get in the stores here are not Key limes.

      Recipe by Christine Sheppard, Fresh Living July 2005, Page 35.


      Ingredients

      • 200g wheatmeal or Granita biscuits
      • ¼ cup ground almonds
      • 1 tbs caster sugar
      • 100g butter, melted
      • 4 eggs, lightly beaten
      • 395g can condensed milk
      • ⅔ cup cream
      • Finely grated rind and juice of 4 limes

      Method

      1. Preheat oven to 170°C. Line base of a 20cm springform tin with baking paper.
      2. Process biscuits until fine crumbs. Add almonds, sugar and butter, process until combined. Press mixture firmly into the base and 3cm up sides of tin. Refrigerate.
      3. Whisk eggs, milk, cream, lime rind and juice until smooth. Pour into biscuit crust.
      4. Place on tray and bake for 40-45 mins or until set. Cool. Serve with extra lime slices.

      I forgot to include the sugar in the crust. I don't think it needed it. Certainly the sweetest tooth in the house (my daughter, though I come a pretty close second) didn't complain.

      I think I preferred the lemon meringue pie filling texture to this pie. I reckon I'll try that recipe with limes.

      Sunday, February 17, 2013

      Peach Tarte Tatin and Bonus Brioche

      I revisited the Tarte Tatin this week but made it with peaches instead of apples. I used 5 large, firm peaches and had about a peach worth of fruit left over after laying the pieces in the pan (23cm cast iron.) Oh well, peach is tasty :-)

      Sorry for the awful photo - I was more interested
      in eating it :-)
      Because it was a hot day yesterday I made the pastry using the blender method that I first used with the custard tarts. It's what most people do, but I still prefer to do things by hand sometimes.

      I got the pastry pastry fitting better this time. I rolled it out to larger than the pan, laid it on top and then cut around the inside of the pan. I then poked the sides down gently so they would form a lip around the tart when it was turned over.

      It was very, very yummy with some double cream on the side.

      Since I already planned on having the oven at 180ºC anyway I decided to make some brioche as well. This would be a breakfast treat for Abbey and Rachel (who missed out on the tart) - French Toast!

      The brioche recipe I use is from Stephanie Alexander's The Cook's Companion in the "basics" section.

      Ingredients

      • 250g plain flour
      • pinch of salt
      • 1 tsp instant dried yeast
      • ½ cup milk
      • 1 tbsp sugar
      • 3 egg yolks, lightly beaten
      • 75g softened butter
      Method
      1. Warm water and sugar slightly, mix until sugar dissolved (I use caster sugar to make this simpler.) Cool if necessary so it's not too hot.
      2. Mix flour, salt and yeast in the bowl of a mixer with a dough hook. Combine eggs and warm milk mixture. Pour the liquid into a well in the flour and mix to a dough.
      3. Work until the dough forms a smooth ball. Personally the dough has never formed a smooth ball even though I run the mixer for at least 10 minutes on speed 2 on my Kitchenaid. The dough always sticks quite convincingly to the sides of the bowl and I have to frequently scrape it off.
      4. Incorporate the butter in two lots. This bit never works for me. I have to frequently stop the mixer to cut the butter into the dough. It will go stringy and then eventually form into a ball again.
      5. Cover the bowl with a clean cloth and allow the dough to double in size - this can take 2 hours in a warm room.
      6. Knock the dough back (flatten it to remove all air) and transfer to a baking tin. I use a 20cm cake loaf tin (it's a bit low - I should find something with higher sides.) Cover and allow to rise again for about an hour.
      7. Bake at 180ºC for 30 minutes. Remove from tin and return to oven for another 10 minutes. Cool before using.
      To make French Toast you need to bake the brioche the day before. Then cut a generous slice between 1-2cm thick and soak well-beaten egg into it. Cook thoroughly on both sides - several minutes on a low heat. Serve with maple syrup or just a dusting of sugar.

      Yum :-)

      Wednesday, February 13, 2013

      Custard Tarts, take 2

      I tried the custard tarts again, doing things slightly differently.

      Last time I rolled the dough out and cut the 12 pieces out to put in the tin. I tried a circle but the largest cutter I had was too small so I switched to squares. That resulted in lots of pointy, burnt corners and an ultimately shallow tart which didn't allow for enough custard.

      This time I separated the dough ball in to 12 pieces and rolled each one individually into a circle. This also allowed me to roll the dough thinner. Thanks to the higher sides I could fill the tarts much higher and used most of the custard liquid (though there were a few lowish ones and I'll keep working on that.)

      I also reduced the blind baking time to 10+10 minutes. The dough was well-baked and not burnt. Much nicer.

      A much better result!

      (Yes, one is missing. I couldn't help myself :-)

      Sunday, February 10, 2013

      Custard Tarts


      This weekend we gathered at my friend Dougal's house to make tomato sauce. We do this every year and it's a good chance to catch up, relax, chew the fat and make some delicious sauce.

      This year Dougal asked me to "instead of BBQ meat, bring something child nommable." Year of Pie to the rescue! I decided to make custard tarts, something I've always enjoyed.

      I got this recipe by Michelle Southan from Fresh Living (April 2004, Page 49) via taste.com.au. It's designed to make six 8cm tarts but I needed to make more so I tried to adapt it to make 12 mini tarts using a cupcake tin. This mostly worked.

      You can see from the photo that I was largely experimenting with how to get the pastry into the cups.

      Ingredients
      • 1½ cups (225g) plain flour
      • 2 tbs icing sugar mixture
      • 125g butter, chilled and cubed
      • 2-3 tbs water
      • 3 eggs
      • 2 tsp vanilla essence
      • ¼ cup (60g) caster sugar
      • 1¼ cups (310ml) milk, warmed
      • Ground nutmeg, to sprinkle
      Method
      1. Process flour, icing sugar mixture and butter, in a food processor until fine crumbs form. Empty into a chilled bowl and make a well in the center. Add 2-3 tbs water and mix with hands gently and quickly until soft dough forms. Roll into a ball, divide into 6 portions.
      2. Roll out each portion to 3-4mm thick, to line six 3cm deep, 8cm (base measurement) round fluted tart tins with removable bases. Put on a baking tray and refrigerate for 15 minutes. Preheat oven to 200°C. Line the pastry cases with baking paper and fill with rice. Bake for 15 minutes. Remove paper and rice. Bake for 15 minutes. 
      3. Reduce oven temperature to 180°C. Combine eggs, vanilla essence, caster sugar and milk. Pour into cases and sprinkle with ground nutmeg. Bake for 20-25 minutes or until just set. 
      I made twelve mini tarts with this recipe which kinda worked. I didn't make the tart case sides high enough (partly because they weren't round enough) which meant there wasn't enough custard in a lot of the tarts. I should've baked the shells for at least 10 minutes less.

      This was also my first week using the food processor to mix the butter and flour for the shortcrust pastry. This was much easier and gave a more consistent result but I'll be trying the manual method again next time - I'd like to think I've got that nailed before I fall back on the mixer more frequently.

      I'm definitely making this one again!